Slack
Prerequisite
- A bot created on the KB Dashboard.
- A Slack account with a created workspace.
Step 1: Create a Slack app
-
Open YourApps page, and login with your Slack account.
-
Click Create New App or Create an App if this is your first application.
.png)
-
On the Create an app page, select From scratch.\
 (2).png)
-
On the Name app & choose workspace page, enter the name of your application and select a workspace for your application.
-
Review and agree to the Slack API terms of service. Then click Create App. Once the application is created, you are directed to Basic Information page.
-
Move to the App Credentials section of the Basic Information page. Then copy and save the Client ID and Client Secret, and Signing Secret.\
 (2).png)
Step 2: Add permissions
-
In the left panel, select OAuth & Permissions.
-
On the OAuth & Permissions page, move to the the Scopes section. Click Add an OAuth Scope under the Bot Token Scopes pane to add the following permissions:
app_mentions:read
channels:history
chat:write
commands
groups:history
im:history
mpim:history
users:read\ (1) (1).png)
-
On the OAuth & Permissions page, move to the OAuth Tokens for Your Workspace section, and then click Install Workspace.\
 (1) (1).png)
-
On the pop-up page, review the workspace permissions that the application will access and then click Allow.
-
Copy and save the Bot User OAuth Token.\
 (1) (1).png)
Step 3: Configure your bot
-
Log in to KB Dashboard.
-
Select a bot from the Personal page or click Create bot if you don't have one.
-
On the Playground page of the bot, click Publish.
-
Find the Slack channel and click Configure.\
 (1) (1).png)
-
Copy and save the OAuth2 Redirect URL, Event Request URL and Slash Request URL for later use.\
 (1) (1).png)
-
Complete the Slack channel configurations as follows:
Configurations Description Token The Bot User OAuth Token of your Slack application. Obtain the Bot User OAuth Token on the OAuth & Permissions page of your Slack application. Client ID The client ID of your Slack application. Obtain it on the Basic Information page of your Slack application. Client Secret The Client Secret of your Slack application. Obtain it on the Basic Information page of your Slack application. Signing Secret The Signing Secret of your Slack application. Obtain it on the Basic Information page of your Slack application. -
Click Save.
Step 4: Configure your Slack app
-
Go back to YourApps page and find your application.
-
Add redirect URL:
-
Click OAuth & Permissions.
-
In the Redirect URLs section, click Add New Redirect URL. Then enter the redirect URL copied earlier and click Add.
-
Click Save URLs.\
 (1).png)
-
-
Configure the bot events that your application subscribes to. Slack will notify your bot of the subscribed user activities.
-
Click Event Subscriptions and toggle Enable Events to on.
-
Enter the previously copied event request URL in the Request URL field.\
 (1).png)
-
Expand the Subscribe to bot events section, click Add Bot User Event to add the events that your bot will use. For example,
app_mentionandmessage.im. -
Click Save Changes.\
 (1).png)
-
-
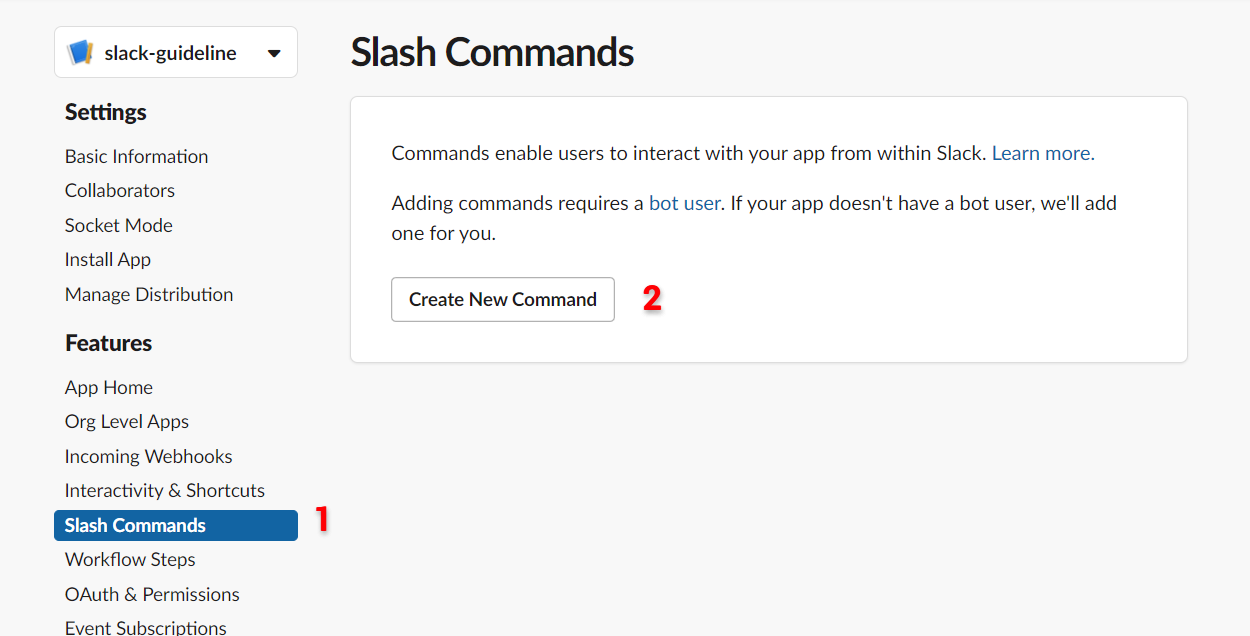
Configure slash commands to allow users to send messages to your bot using slash commands:
-
Click Slash Commands. Then click Create New Command on the Slash Command page.\
-
Configure the command configurations and then click Save.
Command: Set the command to
/new_threadto use this command to clear chat history with the bot.
Request URL: The request URL is the Slash Request URL copied from the Slack channel configurations in KB Dashboard.\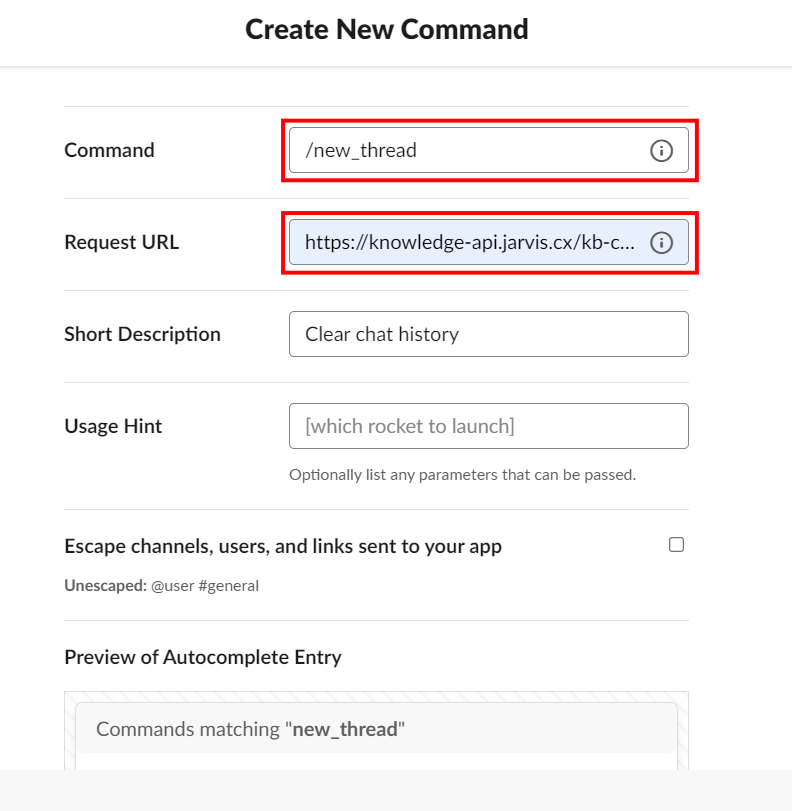
-
-
Enable the user to send a message to your bot:
-
Click App Home.\
 (1).png)
-
In the Show Tabs section, select the Allow users to send Slash commands and messages from the messages tab checkbox under the MessagesTab option.\
 (1).png)
-
-
(Optional) If you want to distribute this bot to other workspaces, you need to complete the following operations:
-
Click Manage Distribution, and expand Remove Hard Coded Information pane.\
 (1).png)
-
Select the I’ve reviewed and removed any hard-coded information checkbox after you read the information above.
-
Click Activate Public Distribution.\
 (1).png)
-
Copy the generated sharable URL in the Share Your App with Any Workspace section.\
 (1).png)
-
Add
&state={app_id}at the end of the copied sharable URL. The app_id is the ID of your slack application.
https://slack.com/oauth/v2/authorize?client_id=4878914704467.6568343811620&scope=app_mentions:read,channels:history,chat:write,commands,groups:history,im:history,mpim:history,users:read&user_scope=&state={app_id}
-
Step 5: Publish and test your bot
-
Go back to the KB Dashboard.
-
Find your bot and click Publish.
-
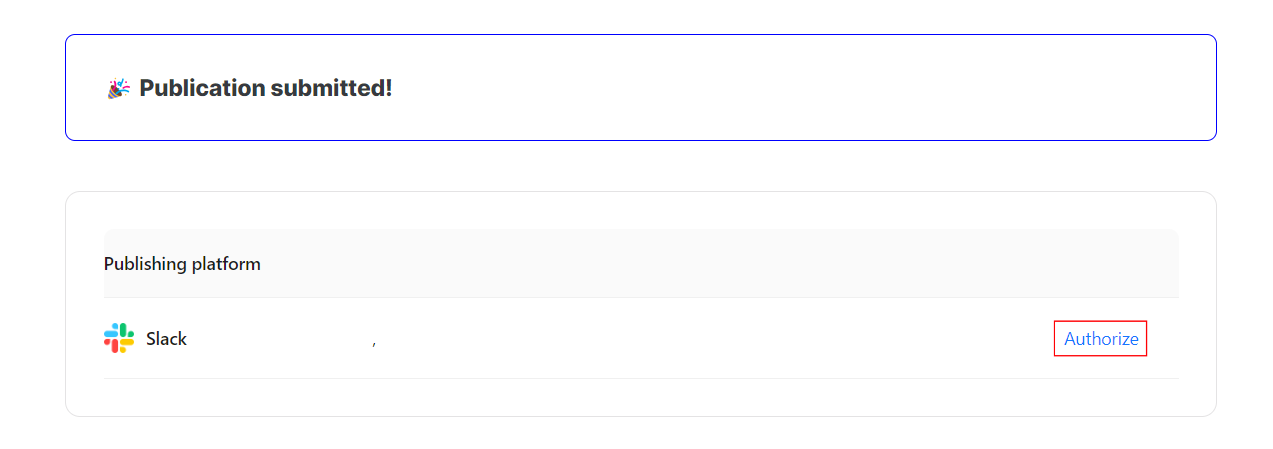
Enter a change log and select the Slack channel. Then click Publish.
-
Click Authorize
-
Select workspace
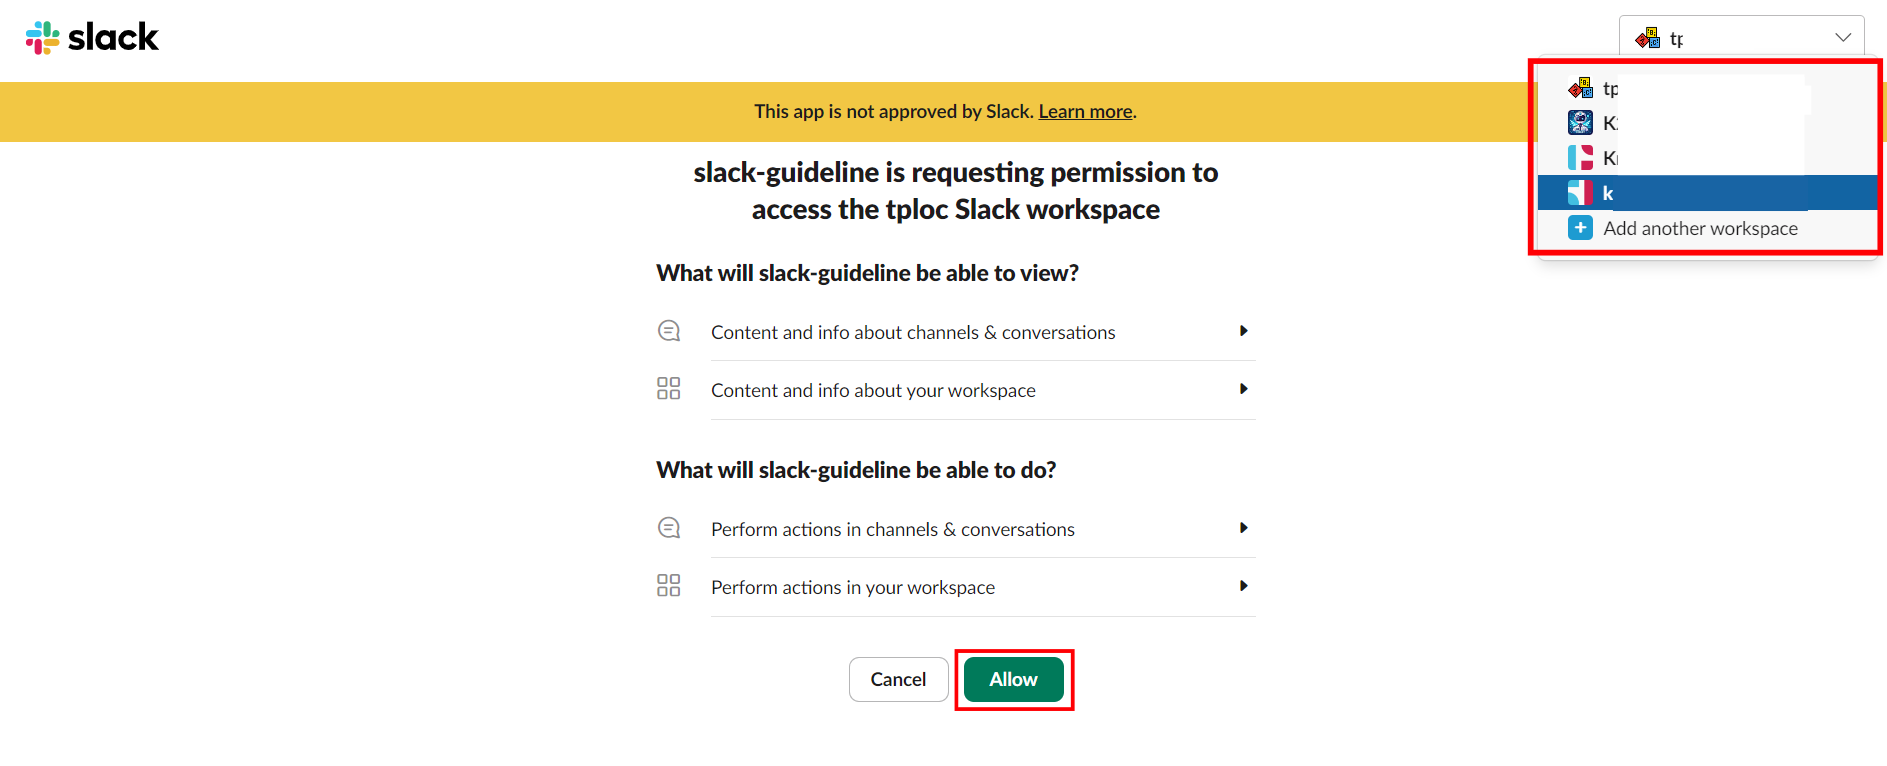
-
Click the Open in Slack link to chat with your bot in Slack.
Supercharge Your Customer Support with AI
Jarvis Helpdesk uses AI to auto-draft responses, search your knowledge base, and resolve tickets faster — no setup needed.
Start Using Helpdesk Free→